


I'm still working on my kitchen redo. I decided I wanted to change things up and make a Roman Curtain for the window above my kitchen sink. And in the spirit of keeping it real, I just want to let you know that the first version was a total sewing fail. I tried to make it no-sew AND Faux and let's just say that hot glue and white canvas do not mix LOL!

So I started over.

Here's what I did:

1. I measured the window and added 3 inches to the length and 2 inches to the 2width. I used my Royal Design Studios Stencil -- Chain Link.
2. I found the easiest way to stencil the pattern was the Roller Lite Touch Up Kit from Home Depot.
3. I laid the stencil on the upper corner of the canvas.
4. After each section, I matched the existing stencil up to the hash marks to be sure it was straight.
5.I did this until the whole fabric was covered.
6. I used a iron to heat set the paint into the canvas.
7.I used an old bed sheet to make a liner. I stitched the sheet to the canvas, making a "pillow case" and then folded 2 inches at the top over to make room for the spring rod.
8. Then I inserted the rod into the casing and hung the curtain.
Keeping it real -- I discovered that the curtain was a little small for the space, so I sewed some white grosgrain ribbon on each side of the curtain to make it fit the space better. I also think it dresses up the curtain.

After I made the panel, I posted about it on my TT&J Facebook page, and mentioned was going to make it into a regular roman shade and then Richella from Imparting Grace sent me an email and told me about her "Faux Roman Shade Tutorial" and it was genius.
![[IMG_3532_2_4.JPG]](https://blogger.googleusercontent.com/img/b/R29vZ2xl/AVvXsEh0ZEX1-oCNSqSWjlHdRa1FpwgI0ou9_zZ3JN7BlVIdqhohs0Kr4ykOCtVSIXORKS4onVvi4ZdfKuIzp_EUkrY2XKr2u0IbIoNXtJ_hA8aDBpinnhtUMD2PKU-qI6nHaFN8qp-lhd1N-Z8/s220/IMG_3532_2_4.JPG)
So I did that! I just inserted two more adjustable spring rods in the window opening and then just folded the panel over the rods to create panels. Be sure to check out her tutorial for more details!!

Super easy. And since I don't really need privacy in this window since it overlooks an open space, I thought this was a good solution!

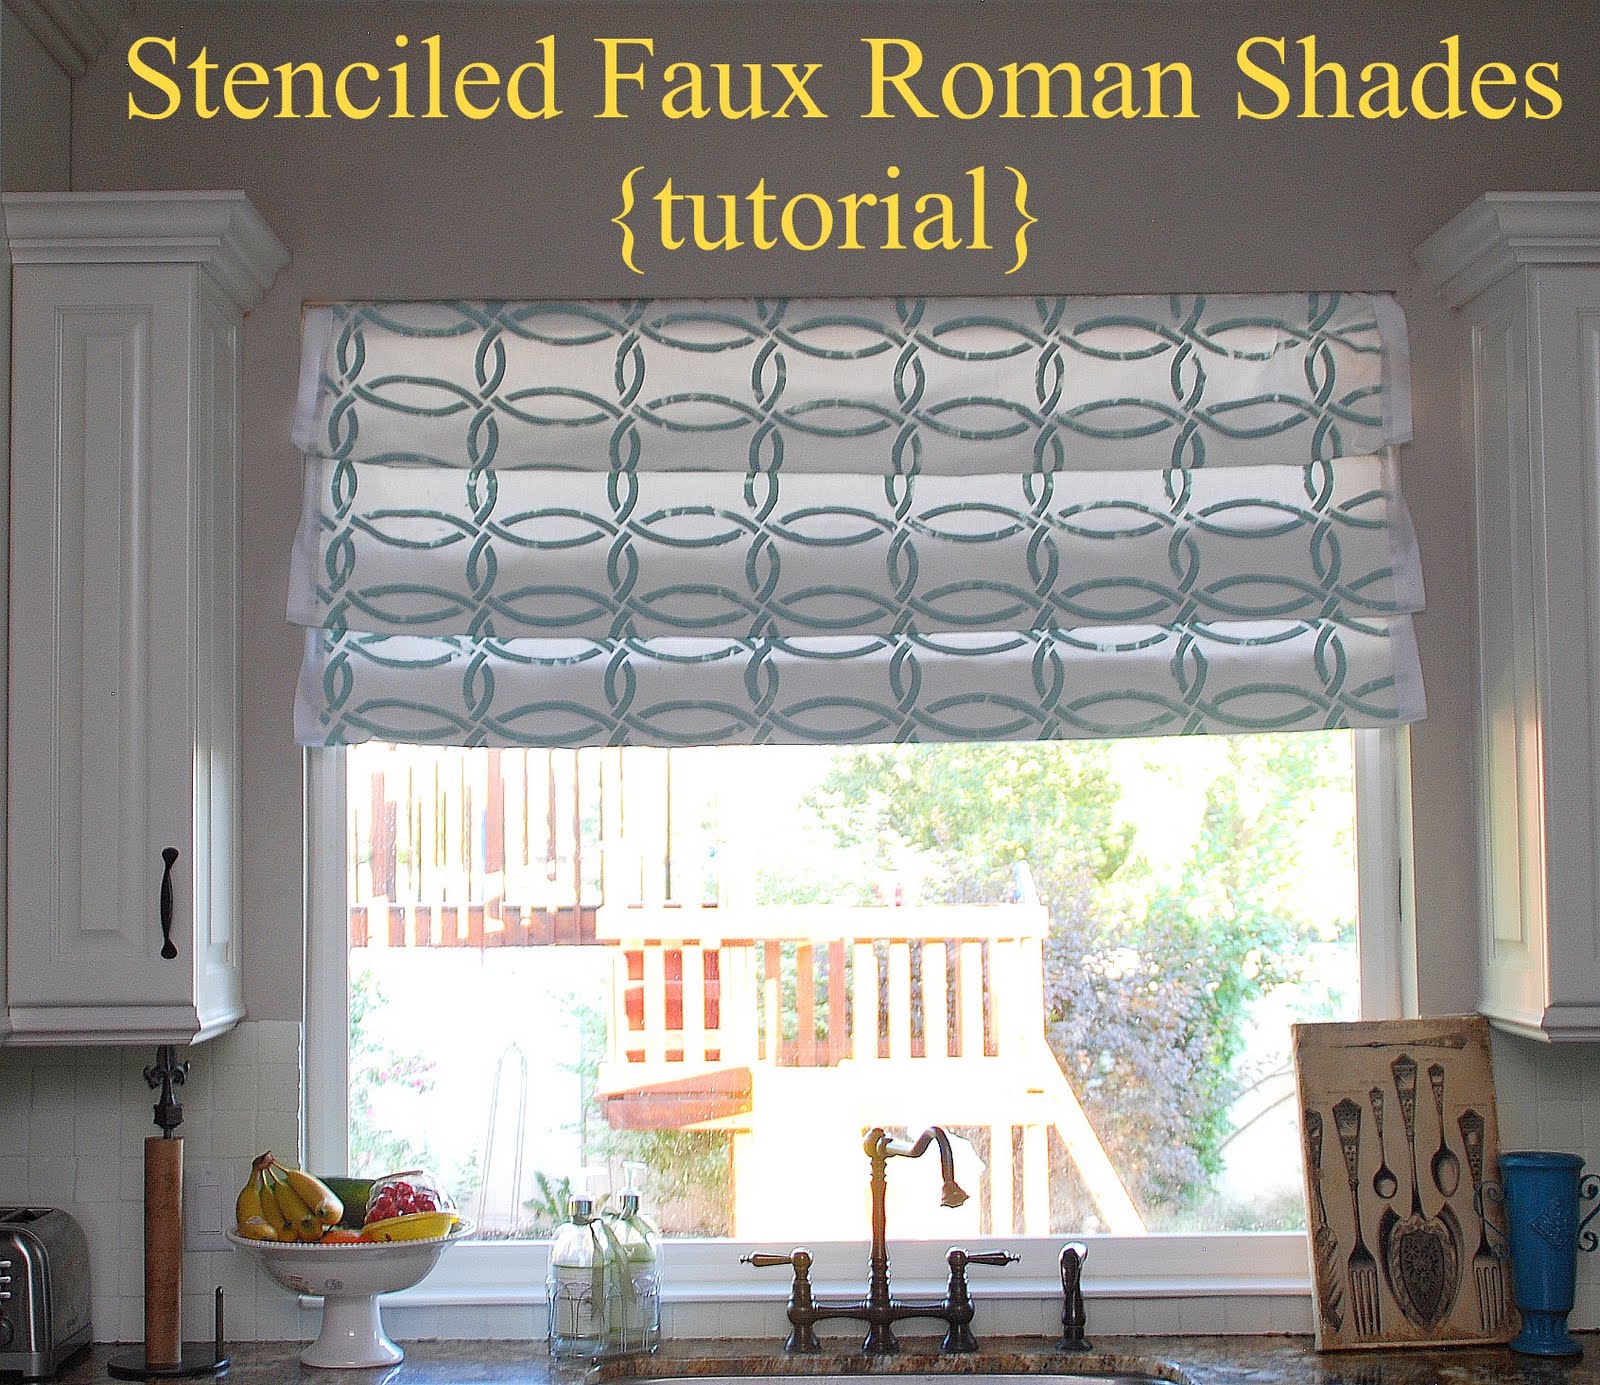
I love that the paint in the curtain is the same as my kitchen island!!

It was hard to get a picture of the actual color of the paint since the sun coming in the window made the paint look so much darker than it really is. The paint is really a really light bluish-green color. The name of the paint is Martha Stewart Rainwater.


I have to say that I love Royal Design Studio Stencils. Their stencils are made out of a heavier material that doesn't stretch, like some of the other stencils I have tried. And my favorite part? They have marks on the stencil that line up with the previous stenciled areas. So it is super easy to keep the stencil straight and lined up! And I love all of their modern designs!! You can find out about all of their designs at their main website!

Have a Colorful Day!!
xoxo
PS -- It's Friday!! My favorite day of the week!! Why?? Because it's the day I get to see what YOU have been working on and feature YOU! Come link up YOUR ideas at the Weekend Wrap Up Party!! It starts at 6 pm {mst}.

And, Are you getting for Back to School?? I am sharing NINE Back to School Printable Ideas over at Babble's Home Ec!!
PPS -- I am linking up to these fun parties - check them out!


0 comments:
Post a Comment