


 |
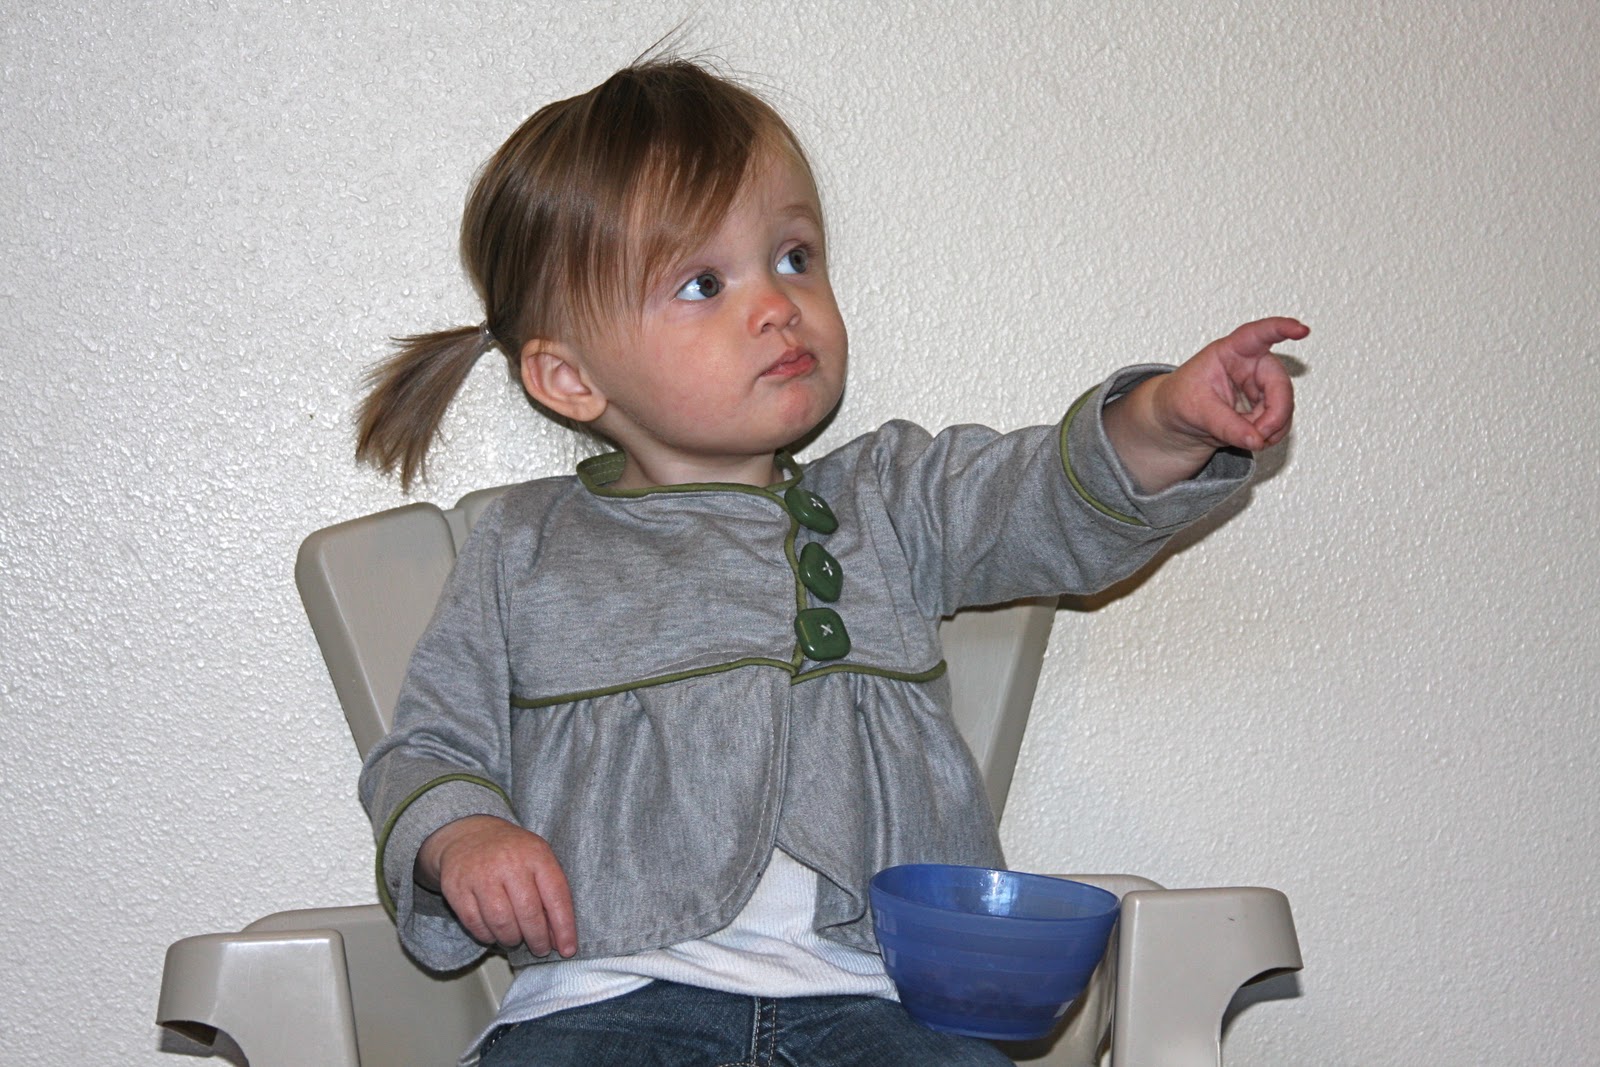
| The perfect little jacket for sitting back and enjoying life Hi Tater Tot and Jello readers!! I am a secret stalker of Jen's amazing blog and all the amazingly creative projects shared here. Which is why it is such an honor to be here today. (I think it made my year)  A little introduction, my name is Shauna and I am Shwin W behind shwin & shwin. I LOVE to sew and create, my sister and I started our blog to share the things we create with each other since we live a world apart, we thought we would share with others along the way. It has been so much fun to create and share. I hope you join us some time. Today I am sharing a little asymmetric cropped jacket. Enjoy! |

I find that you can find inspiration all around you. Today's jacket was inspired by some buttons. I ripped them off an old jacket, and created the shapes colors and design after the buttons. So find some cool buttons that speak to you and let's get started!
What you will need:
- Fabric (I used Jersey knit)
- piping
- buttons
- 1/8 inch elastic
 |
Lets start by making the pattern. (I like to use graph paper it helps make straight lines) Take a shirt that fits well (maybe even a little loose) place it on a piece of paper so it is half way through the shirt and just under the arm opening. (as shown above) Trace the outline include a seam allowance when you do this. |
 |
| Cut out your tracing and then trace another one only make it about 2 inches wider. So you have two pieces as shown above. The narrower one label "back" cut 1 and you will cut it on a fold along the long side. The wider one label "front" cut 2 (not on fold) |
 |
Now for the sleeves. Trace the sleeve from a shirt that fits well, and add seam allowance. Label as sleeve cut 2 cut along a fold on the top line. |
 |
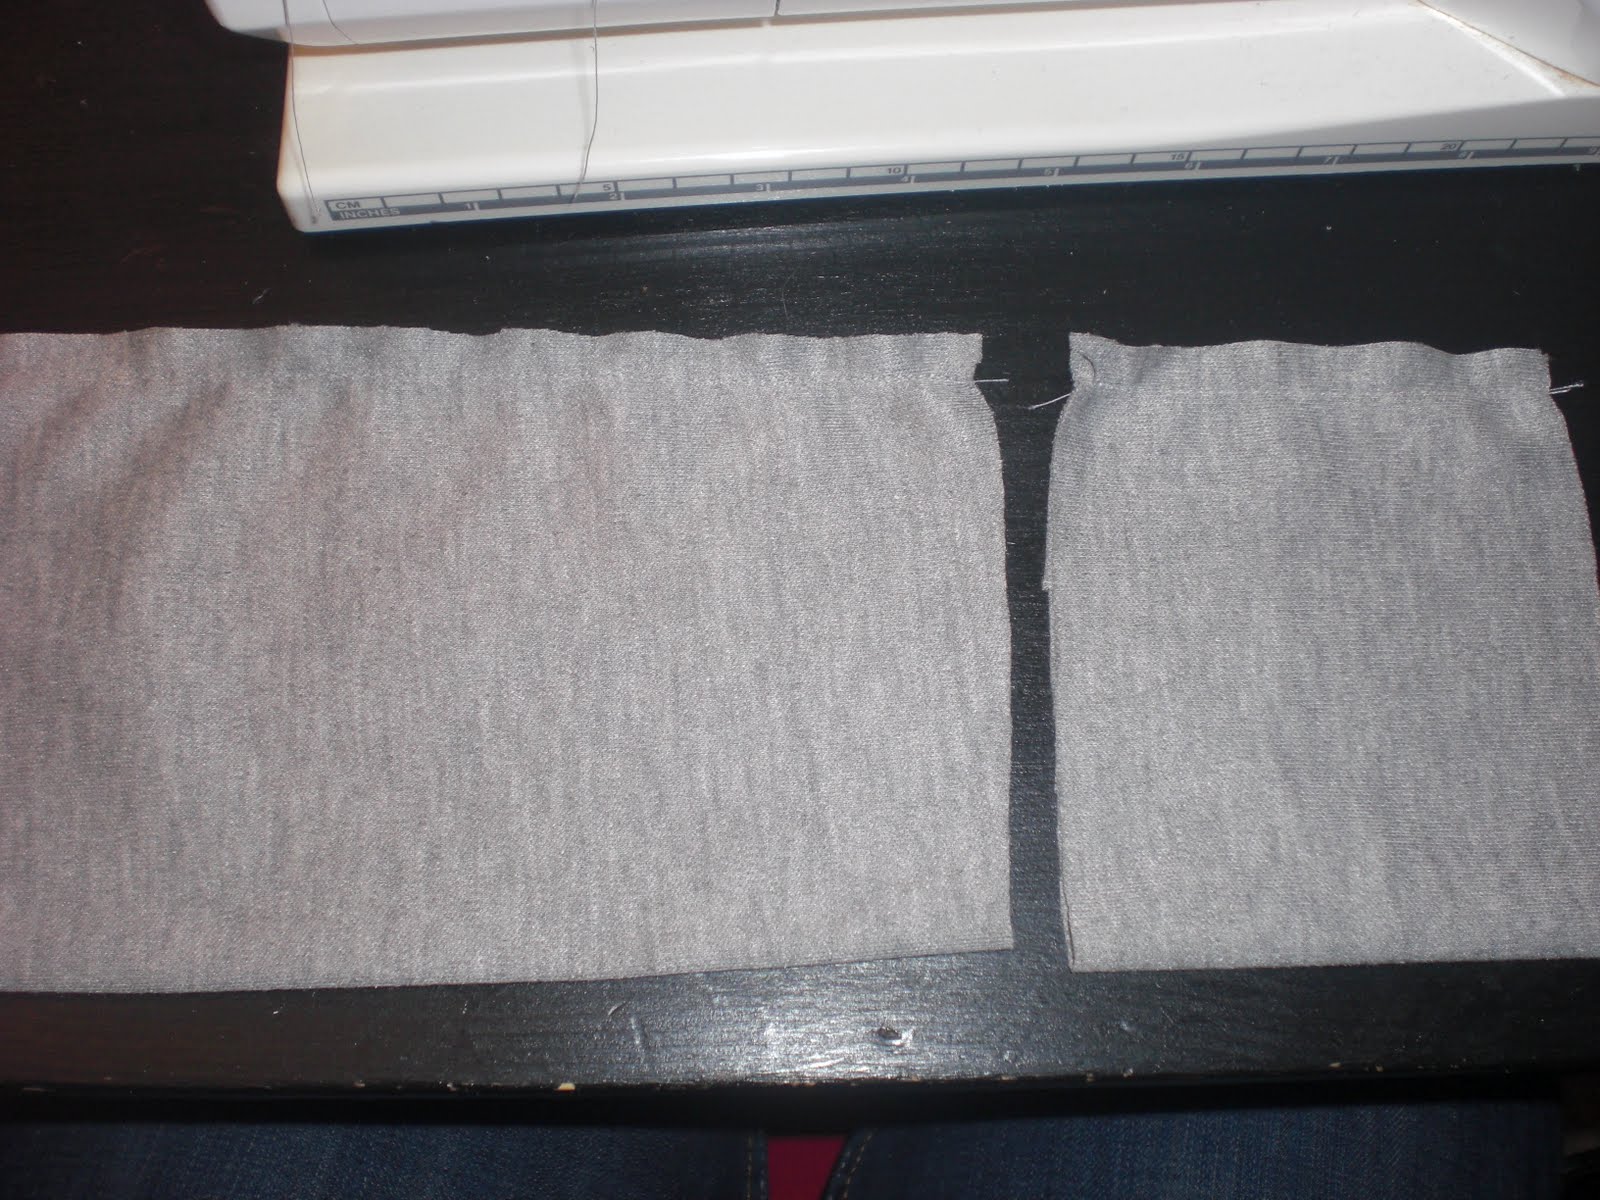
Ok the other pieces I made without tracing, so let me explain them for you. The rectangle labeled "back" is the width of the top back piece (the first one you traced) the length depends on how long you want the jacket, so it is a simple rectangle. Label cut 2 and you will cut on a fold along the right hand side. Then the one labeled front with the curve, will have the same length of the back rectangle you just made. The width is double the width of the back rectangle and then on one end I rounded the edge. Label that front and you will cut 4 not on a fold. The last piece is the cuff. Another rectangle it should be the width of the end of the sleeve piece, (you will cut it on the fold along the same edge of the sleeve piece) then however long as you want the cuff, double it and that is your cuff. (you will cut 2 of them) So the picture above shows all the pieces you should have. Did you follow all of that? Cut out your pieces and then we are ready to sew! |
 |
| Start by sewing the back piece to the two front pieces at the shoulder and side seams |
 |
| Then take the piping and pin it to the right side of the top all along the edges. Clip the flap of the piping when you get to a corner so that it goes around the corner well. Sew in place. Follow the stitch line that is already on the piping. |
 |
| Turn the piping so the flap in on the inside now and top stitch in place. |
 |
| Now for the sleeves. With the sleeve folded right sides together sew along the raw edge. do the same for the cuff. |
 |
| Turn the sleeve right side out and pin piping around the bottom of the sleeve. Overlap the ends like a criss cross (as shown above) so they flow off the edge of the sleeve. Then sew in place, again following the line of the stitch that is already there. |
 |
| Now fold the cuff, so the seam is on the inside. |
 |
| Now place your cuff around the sleeve so the raw ends match up. Sew in place. If you sew following the stitch line you already have in place on the sleeve you will have the best results. |
 |
| Now you have a sleeve with a cuff. Do that for both sleeves. |
 |
| Now pin right sides together with the sleeve inside the arm opening sew in place. |
 |
| Now do that with both sleeves. |
 |
| For the lower half of the top sew the non curved edge of the front piece to the sides of the back rectangle. You should have two identical pieces then that have the curved side on both ends. Then right sides together sew the two pieces together starting at the top of the curved edge and all along the bottom. Then turn is right side |
 |
| Now more piping. You are going to pin and sew the piping all around the bottom edge of the top just as you have done before. Fold over the edge so you get a nice finished edge. |
 |
| Then ruffle the bottom piece just in the front on both sides of the curved pieces. Gather it just so it is the length of the top piece. Then sew it along your piping that you sewed to the top piece. (you are almost done) |
 |
| Then with the elastic sew little loops to the inside of the flap. |
 |
| Then sew the buttons to the other side, sew them over the the side since there will be overlap. |
 |
| Then you are done. Pretty easy right? |
 |
| Don't you just love the little details? |
|
| The perfect little jacket for sitting back and enjoying life Enjoy!  |
The jacket and the baby are adorable -- I'll take them both LOL.
Thanks Shauna!
I love Shwin & Shwin - they have tons of awesome tutorials!

This Ruffle Top Shirt - how hip and adorable!

These ABC Flash Cards -- did I already say adorable???

I love this Modern, Whimsical Kitchen Curtain!

And the girls at Shwin & Shwin are having tryouts for Project "toddler" Runway!! Check it out HERE! I can't wait for that!!

Be sure to check out Shwin & Shwin!!
xoxo

PS -- Check out Beckie's Pennywise Presents Series -- great gift ideas for less $$$! I'm sharing an easy Felt and Leather Flower Tutorial that can be made into a bunch of different gift ideas!


0 comments:
Post a Comment