Pages

Subscribe:
Showing posts with label stenciling. Show all posts

Thursday, September 8, 2011

Stenciled Napkin Pillows for my banquette -- with Royal Design Studios!! {tutorial}!!


 I have been on a bit of a stenciling kick this summer...


stenciled projects


I stenciled a Chevron rug,  a Spray Painted Circle Rug, and then I tackled my kitchen window with some Faux Roman Shades and some painted pillows for my kitchen banquette.


And yesterday I stenciled this rug for my family room -- only with thicker stripes!! It turned out SOOO good!! I'll be sharing that soon. 


I thought it might be fun to make some pillows for my Kitchen Banquette with Royal Design Studio stencils and some white and patterned napkins I found at Target. {these are the Chain Link and Lattice Endless Circle Stencils}


Super easy!!


stenciled napkin pillows header


Here's how to make them -- 

Stenciled Napkin Pillows


stenciled napkin pillows collage


  1. The first thing I did was I mixed up some paint and Martha Stewart’s paint medium. This makes the paint softer and washable.

  2. Then I laid the napkin on my work surface and taped the Royal Design Studio - Chain Link Stencil and Endless Circles Stencil over the top with some painter’s tape.

  3. I used this really cool roller top that fits on top a container and it makes stenciling a breeze. It’s also from Martha Stewart’s new decorative paint line.

  4. Once it was painted, I laid the napkins out to dry.

  5. Then I sewed another napkin to the stenciled side and added a zipper.


So now I have some fun pillows that go with my new kitchen décor AND they were super easy to make!!


stenciled napkin pillows from the side


I love Royal Design Studio because they have amazing, modern design AND their stencils are made out of the highest quality materials and they have guide marks that make lining up the stencils on a wall a breeze.


three stenciled napkin pillows


Have a Fantastic Friday!!!


xoxo


 PS-- Do you love Chevron as much as I do?? Check out the 22 Chevron DIY Ideas I shared on Babble's New Home Ec today :)


PPS -- Did I say FRIDAY??? It's my favorite day of the week. Why??? It's almost time for the Weekend Wrap Up Party!! It's YOUR time to show off what YOU have been doing. I love featuring YOU!!! The party starts at 6 pm MST.


See you then!!! 


Friday, August 26, 2011

Stenciled Circle Rug Tutorial {Spray Paint Project}


Have I ever mentioned that I have a slight obsession with the Disney Show "Good Luck Charlie"? 


I was sick last Spring and spent about 5 hours straight watching it in some sort of "Good Luck Charlie" marathon - lol! I adore the use of color in the "Good Luck Charlie" house!!


Like their turquoise couch! So fun. I developed a bit of a crush on the rug from that set. So I tracked it down and discovered that it is the Key Turquoise Rug from Suzanne Sharp - a famous rug designer and also several thousand dollars. Update -- just requested the price list and yes, it's $5,000 - yikes!!! I think I'm going to try to recreate this rug for my family room :)


And while I was obsessing about this rug, I fond another rug. Also by Suzanne Sharp and decided to try to recreate that -- it's the Sellarsbrook rug.


Here's what I did: 


1. I used cheap rolls of shelf liner. 


2. I traced two sizes of plates onto the liner. 


3. I cut out the circles. 


4. I laid the circles on the rug and overlapped them, three rows.


5.Then I taped rows on top of the circles. And taped the edges up.


6. Then I spray painted the whole rug. 


I bought the rug from Ikea. It was $24.99. In retrospect, I should have rolled the paint on instead of spray painting. The rug has ridges, so it was hard to get the rug taped with the ridges, so some of the spray paint did get underneath the tape. If I had rolled it on, I think the edges would have been a little crisper. 


But overall I'm really pleased with the rug. It looks so pretty in my garden -- with my striped yellow bench.  I love turquoise and yellow together!! 


So now my patio is extra colorful!!! 


and instead of the $3000 price tag -- mine was under $40!!


Thanks for stopping by - I appreciate it!! 


Have a Fantastic Friday!! 


xoxo


PS-- This post is linked up with Beth!!


Monday, August 22, 2011

Stenciled Pillows {tutorial} -- New Martha Stewart Decorative Paint Line!!


Last week I came home to a big box of craftiness!! 


 It was the new Martha Stewart Crafts Decorative Paint Line. And let me tell you - this line has things that have never been available before!! 


For one thing, the colors of this line are beautiful -- 160 colors to choose from, in all sorts of finishes: Glitter, Pearl, Satin and High Gloss!!


I love this idea -- there are special applicator tops that convert paint bottles into tools!! So you can add your paint to the bottle and then screw on an applicator top and you are ready to stencil without having to keep dipping your roller in a paint tray. Not only is it convenient but it also saves on materials and clean up!!


And my favorite thing might be the revolutionary Spray Paint Kit that lets you turn any Martha Stewart paint color into a spray paint.


{What??? Yes, it's true!!!} 

I can't tell you how excited I am about this. I am not going to be boxed into a project just based on the limited spray paint colors that are available at the hardware store. Now I have 160 colors of spray painting options for projects. This is genius!!


Plus, there are really cool mediums like Chalkboard, Gilding, Glow-in-the-Dark, Etching, Metal Primer and they work on all crafting surfaces including
wood, metal, glass, ceramic, Terra-cotta and fabric.  PLUS,  it's
indoor/outdoor safe and  is dishwasher-safe when used on glass. And it's non-toxic, so it's safe to use around your kiddos. Amazing!! 


 Just think of the project possibilities - the sky's the limit!! 


I was on vacation when my package arrived, so I only had one day to play with the products, but I am SO excited to try out all of the different products in this line.


And the stencils are FAB!!


I made a few different pillows for my new Kitchen Makeover.


Stenciled Pillows Tutorial:


  • Measure your pillow form and add 2 inch to the width and length of your pre-washed fabric.


  • Add Paint and Fabric Medium to Roller Container.


  • I found the trick was to roll the paint on and then use the smaller sponge to smooth the paint over the fabric. This smoothed the paint and made the surface even. 


  • Then, once the painted dried, I ironed the pillow fronts to "set" the paint. This makes the paint washable.


  •  The last thing I did was I sewed the pillows together. And guess what?? I made my first zippered pillows. So fun!! A tutorial on that coming up soon!! 


I also made two other pillows using Martha Stewart supplies. The first was I made over this star pillow. I used the Spray Paint Kit. It was incredible. It works just like regular spray paint!! It is a little pricey -- so save your 40% off coupons :) **I have a link to a coupon at the bottom of this post.


Then I used one of the special brushes to make lines on the pillow. I love that it looks hand done!


And the last pillow I made I added rows of ruffle fabric and stenciled the word "Family" with another of the Martha Stewart Stencils.


I had such a ball experimenting with this new Martha Stewart craft line, brought to you exclusively by Plaid Crafts. The product is available at Michaels stores in the US and
Canada starting the last week of August. You will love all of the possibilities this new line will bring to your creative projects!!


**Here is a link to a 40% off Michael's coupon


All opinions are 100% mine.


Full post disclosure here.


And, there are so many wonderful tutorials using this line coming up in the next two weeks from dozens of creative bloggers. I can't wait to see all of the fun projects!! Be sure to check out the ones today from: 


Have a Wonderful Day!! 


And if you want more information, here's a video from Martha demonstrating this line:


xoxo


PS -- If you want to win some product from this new Martha Stewart Craft Paint line, some giveaways will be coming up. I'll let you know about them. So stay tuned :)


Friday, August 19, 2011

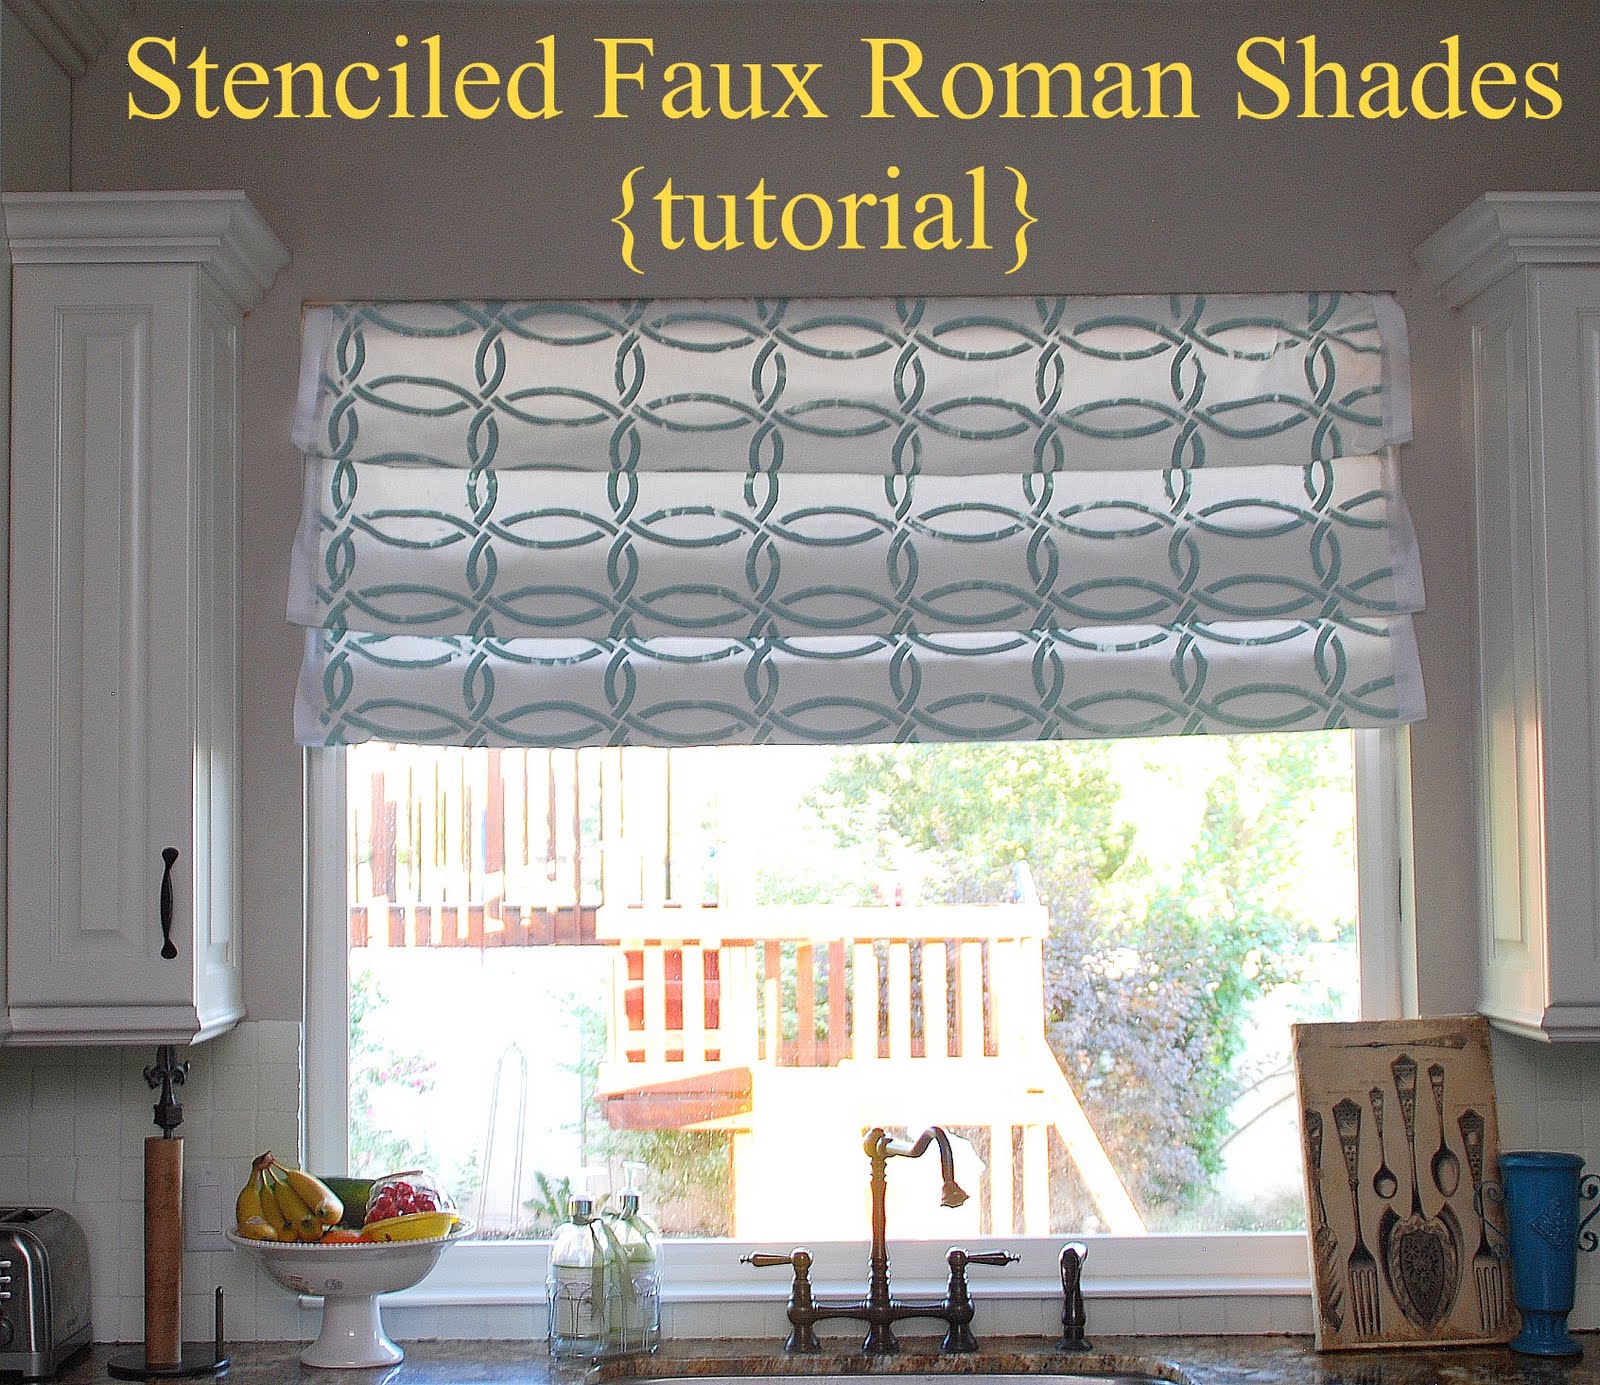
Stenciled Faux Roman Shades {tutorial} -- Kitchen Sneak Peek


I'm still working on my kitchen redo. I decided I wanted to change things up and make a Roman Curtain for the window above my kitchen sink. And in the spirit of keeping it real, I just want to let you know that the first version was a total sewing fail. I tried to make it no-sew AND Faux and let's just say that hot glue and white canvas do not mix LOL!


So I started over.


Here's what I did: 


1. I measured the window and added 3 inches to the length and 2 inches to the 2width. I used my Royal Design Studios Stencil -- Chain Link.


2. I found the easiest way to stencil the pattern was the Roller Lite Touch Up Kit from Home Depot.


3. I laid the stencil on the upper corner of the canvas. 


4. After each section, I matched the existing stencil up to the hash marks to be sure it was straight. 


5.I did this until the whole fabric was covered.


6. I used a iron to heat set the paint into the canvas.


7.I used an old bed sheet to make a liner. I stitched the sheet to the canvas, making a "pillow case" and then folded 2 inches at the top over to make room for the spring rod.


8. Then I inserted the rod into the casing and hung the curtain. 


Keeping it real -- I discovered that the curtain was a little small for the space, so I sewed some white grosgrain ribbon on each side of the curtain to make it fit the space better. I also think it dresses up the curtain. 


After I made the panel, I posted about it on my TT&J Facebook page, and mentioned was going to make it into a regular roman shade and then Richella from Imparting Grace sent me an email and told me about her "Faux Roman Shade Tutorial" and it was genius.


 [IMG_3532_2_4.JPG]

So I did that! I just inserted two more adjustable spring rods in the window opening and then just folded the panel over the rods to create panels. Be sure to check out her tutorial for more details!!


Super easy. And since I don't really need privacy in this window since it overlooks an open space, I thought this was a good solution!


I love that the paint in the curtain is the same as my kitchen island!! 


It was hard to get a picture of the actual color of the paint since the sun coming in the window made the paint look so much darker than it really is. The paint is really a really light bluish-green color. The name of the paint is Martha Stewart Rainwater.


I have to say that I love Royal Design Studio Stencils. Their stencils are made out of a heavier material that doesn't stretch, like some of the other stencils I have tried. And my favorite part? They have marks on the stencil that line up with the previous stenciled areas. So it is super easy to keep the stencil straight and lined up! And I love all of their modern designs!! You can find out about all of their designs at their main website!


Have a Colorful Day!! 


xoxo


PS -- It's Friday!! My favorite day of the week!! Why?? Because it's the day I get to see what YOU have been working on and feature YOU! Come link up YOUR ideas at the Weekend Wrap Up Party!! It starts at 6 pm {mst}.


book worm apple1 Nine {Free} Back to School Printables!


And, Are you getting for Back to School?? I am sharing NINE Back to School Printable Ideas over at Babble's Home Ec!!


 PPS -- I am linking up to these fun parties - check them out!


The DIY Show OffBCD 125UndertheTableandDreaminggiveawaysTidy Mom I'm Lovin It Fridays


AD

Related Posts Plugin for WordPress, Blogger...