


Showing posts with label upcycling. Show all posts
Showing posts with label upcycling. Show all posts
Monday, May 7, 2012
Vintage Dining Room Set Makeover: Paint It Black
What a difference a coat of paint can make!
I've been pining over the look of traditional vintage dining room sets with black chairs and black table bottoms where the table top is left with a natural wood finish. (similar to the table and chairs shown in the photo below)
This photo was my color inspiration:
Inspiration photo
Then I came across an old dining room set that was decent

Tuesday, April 24, 2012
Paint It Black: Stylish Black Painted Furniture
There's something about black painted furniture that I just love! Check out these examples and maybe you'll see what I mean...
Mix and match dining room chairs - just paint them a uniform black!
(above and below)
Black painted dresser from Anthropologie
Black on black dresser chest from Joss & Main
Black with bold white text
Black painted twin beds
I love the
Thursday, April 19, 2012
How To Upcycle Thrift Shop Finds Into Trendy Home Decor
Thrift Shop Hot! What to look for right now....
In my last post I shared some tips for shopping thrift shops. Now I'm going to share with you some items commonly found at thrift shops that are great for upcycling into swanky home decor and crafts. These items are great because not only are they inexpensive, but they are very much in style as current home decor. Check it out!
What
Monday, April 16, 2012
Tips For Thrift Shop Shopping
"Why shop at thrift shops?" you may ask.
"Well why the heck not!?" is my answer!
If you are a regular reader of my blog, then I'll bet you may already be a seasoned thrift shopping pro, since I write a lot about upcycling and repurposing salvaged finds. Or maybe you have never been to a thrift shop before. If you haven't, and you like antiques, vintage things, upcycling, creating cool stuff,
Monday, February 6, 2012
Branching Out: Art & Decor From Wood Slices, Branches, Twigs & Driftwood
Check out this unique home decor made from tree branches, twigs, sticks and driftwood. Most of the supplies needed to make these items can be found in your very own backyard!
Branch vase tutorial from GardenMama
Twig birdhouses. Adorable.
Peace
Wood slice garden path by Domesticated Nomad
DIY birch bark lamps from Ruffled
Branch scarf rack
Wood slice flower
Wednesday, February 1, 2012
Check Out My Crib! Upcycled Baby Cribs
What to do with that old baby crib that's in the attic? Check out these interesting new uses for old and recalled baby cribs, and be inspired!
Crib spring DIY
From crib to play table DIY
Victorian crib repurposed to a settee from Country Living
Garden trellis
From old crib to new bench
Chalkboard easel DIY instructions
Awesome
Wednesday, December 21, 2011
Upcycled Spice Tin Fridge Magnets
What a great way to show off those pretty spice and tea containers!I've been saving a few beautiful paprika tins (I'm Ukrainian - we go through paprika like you would not believe) figuring that one day I would do something creative with them...now I know! The best part of this project is that all you need are the tins and some strong magnets - no glue required. Just put the magnet
Thursday, July 14, 2011
Summer Mantel:Take Two {adding reclaimed shutters}

There was something missing from my "Beachy" mantel. I couldn't put my finger on it yesterday. Then last night as I was getting ready for bed I remembered some free shutters that I picked up by the side of the road on trash day a few months ago. Perfect!! You know how a flashbulb goes off in your mind?
A fast, easy and free solution to my decorating dilemma!

Before


So this morning I dusted off those old shutters and dug through my spraypaint stash for some paint. I painted the first coat the same "aqua" color as the frame on my mantel. And then when it was finished drying, I added "heirloom white" over the top.

The last thing I did was get my trusty mouse sander and I roughed it all up so the delicious aqua peeks through as well as the original brown color and the bare wood. I love the dimension that sanding adds!!

Then I put it on my mantel. I opened the shutters a little so that the reflection of the mirror still comes through and lights up the room. Then I rearranged some of the mantel items.

And I put the little canvas pennant at the top of the mantel. I got the little sewn pennant shapes from The Canvas Corp. I love the plain canvas with my beach theme.


I think my mantel is done.
{For now -- lol!!}

I put my Summer Subway Art above my entry cabinet. I decided it didn't really go with my Beachy Mantel. But I still really love it!

PS -- While my shutters were drying, I ran to Home Depot and got some samples for my kitchen makeover. Here's what we have so far. Any opinions?? the cabinets are now white so I was thinking a warm grey would be pretty....


xoxoxo


Saturday, June 25, 2011
Great Ideas -- Fabulous Projects you can make for under $10!!
Hi TT&Jers, I am Taylor from Taylor Made. I'm so excited to be here today because I adore Tatertots and Jello; it was one of my very first blogs to read and inspired me to start my own blog.
 In honor of Jen's fabulous London trip, I thought I would share my tutorial on how to make your very own Union Jack Stationery. Maybe this will help with our trip envy?
Taylor Made is about all of my favorite things... crafts, art, food, home and family. I went to college for costume design, became a flight attendant, then an elementary school teacher, now I have my favorite job of all - Mommy. I have a bad obsession with hoarding fabric, Mod Podge and Reality TV. I will use anything and everything for inspiration for a project so without further adieu... lets get this Weekend Wrap-Up Party started y'all (couldn't help it, I'm from Texas)!
I don't know about you but I cant make it out of any craft store without spending $30. But, there is something to be said about making something beautiful and not spending a ton of money.
These features can all be made for less than $10 and I love that!

10 Minute Pillow Case by Rae Gun Ramblings


See you all tomorrow for some more fabulous projects!

Specializing in paper embellishments -- perfect for all sorts of projects.

Friday, April 22, 2011
Give clothes new life with Rhinestones {and a sparkly Silhouette deal}

In honor of Earth Day I have a little project that will help add some new life to hand-me-down clothes.
You might know that I have four kids. Well, if any of you had older siblings you might know what it's like to get hand-me-downs. Ella, my youngest has two older sisters and she is very familiar with hand-me-downs...

So when Silhouette sent me a really fabulous Rhinestone kit and asked me to make something with it, I immediately thought it would be fun to take something in Ella's hand-me-down pile and get her excited about wearing it.
She was thrilled!!

She picked out a red shirt and a pair of shorts her sister Hannah had only worn a few times. Then I let her pick out ANY of the Rhinestone Designs on the Silhouette Online Store. I was surprised at how many designs they have!! We might have spent a couple of hours deciding on our favorite -- just sayin'. It was a hard decision for a 6 year old!!
She finally decided on this happy flower pattern:

Now this truly is a quick project.
We were done in 20 minutes.
Silhouette Rhinestone Tutorial:

1. Took the Rhinestone Transfer paper, loaded it into the Silhouette machine and printed out the image.
2. Poked out the holes.
3. We used the Silhouette Universal hook to poke out the holes.
4. Once the image was clean, we peeled off the back of the special Rhinestone Transfer Paper and adhered it to the backing board that came with the kit.

5. Took the various sizes of Rhinestones and decided where to place them in the design.
6. Used a special tool that came with the kit to push the rhinestones into the holes.
7. Got the rest of the rhinestones in place with another special tool.
8. This tool is the Pick Me Up and has a sticky end that grabs the rhinestone so you can pick it up and put it in place. Very handy.

9. Once the design was ready, we got out our transfer paper.
10. We laid a piece of transfer paper over the top of the design, sticky side down and pressed down on the design.
11. Then when we peeled the paper up, the rhinestones were stuck to the inside.
12. The last thing was to lay the transfer paper over the spot where we wanted the design to be on the top and shirt and then we ironed the rhinestones on the fabric. And to make it stick even more, we turned the shirt and shorts inside out and ironed them from the inside as well.
**For the shorts -- I wanted to use the same design but not have it be exactly the same as the shirt, so I only used rhinestones on the round flowers and not the vines.

So now Ella is thrilled to get hand-me-down clothes because she knows that she can add some bling to them and make them her own!!
And guess what??? Silhouette is offering a special discount on their machine with a special Rhinestone package from now until APRIL 26th.
By entering the code -- TATER at checkout, you'll receive the Silhouette Rhinestone Bundle, which includes...
discounted 30% this month! These prices should automatically be lowered when you purchase them at checkout :)

Sunday, April 3, 2011
Guest Post -- How to Re-purpose Items in Your Home!
Hello! My name is Amanda from the blog "Be Sweet".

Thank you so much Jen for having me. :)
Be Sweet is a blog/ journal where I keep track of current craft projects, home renovations, what's going on in our life, and the ups and downs of motherhood.
 |
| (Pay no attention my daughter- she really does like me.) |
My
husband and I recently bought a small fixer-upper. This small fixer-
upper has turned into a larger fixer-upper than we planned.
( Isnt that always how it goes!?) Ha. The extra projects have cut into our decorating budget.
( Yes, I say "our" since my husband thinks he is the next Nate Berkus and has a decorating opinion on everything!)
SO
I have had to get creative. Here are a few ideas of things I have used
around my house to help it feel more like home and not so much like "
we just moved in."

1. My Dad gave me this old wooden ironing board he saved a while back.
We took off the old green cover, gave it a quick wash down and now it
has new life as a bulletin board in our laundry area. I love how it goes
with the theme of the space but is also functional.


2. I bought this yard stick at a Antique store for 3 bucks. I glued on
some clothes pins and now it displays my daughters art work in her
playroom.
*
Notice the poor cupcake's real sprinkles are all gone?? More than once I
have caught my daughter licking the paper... awesome.
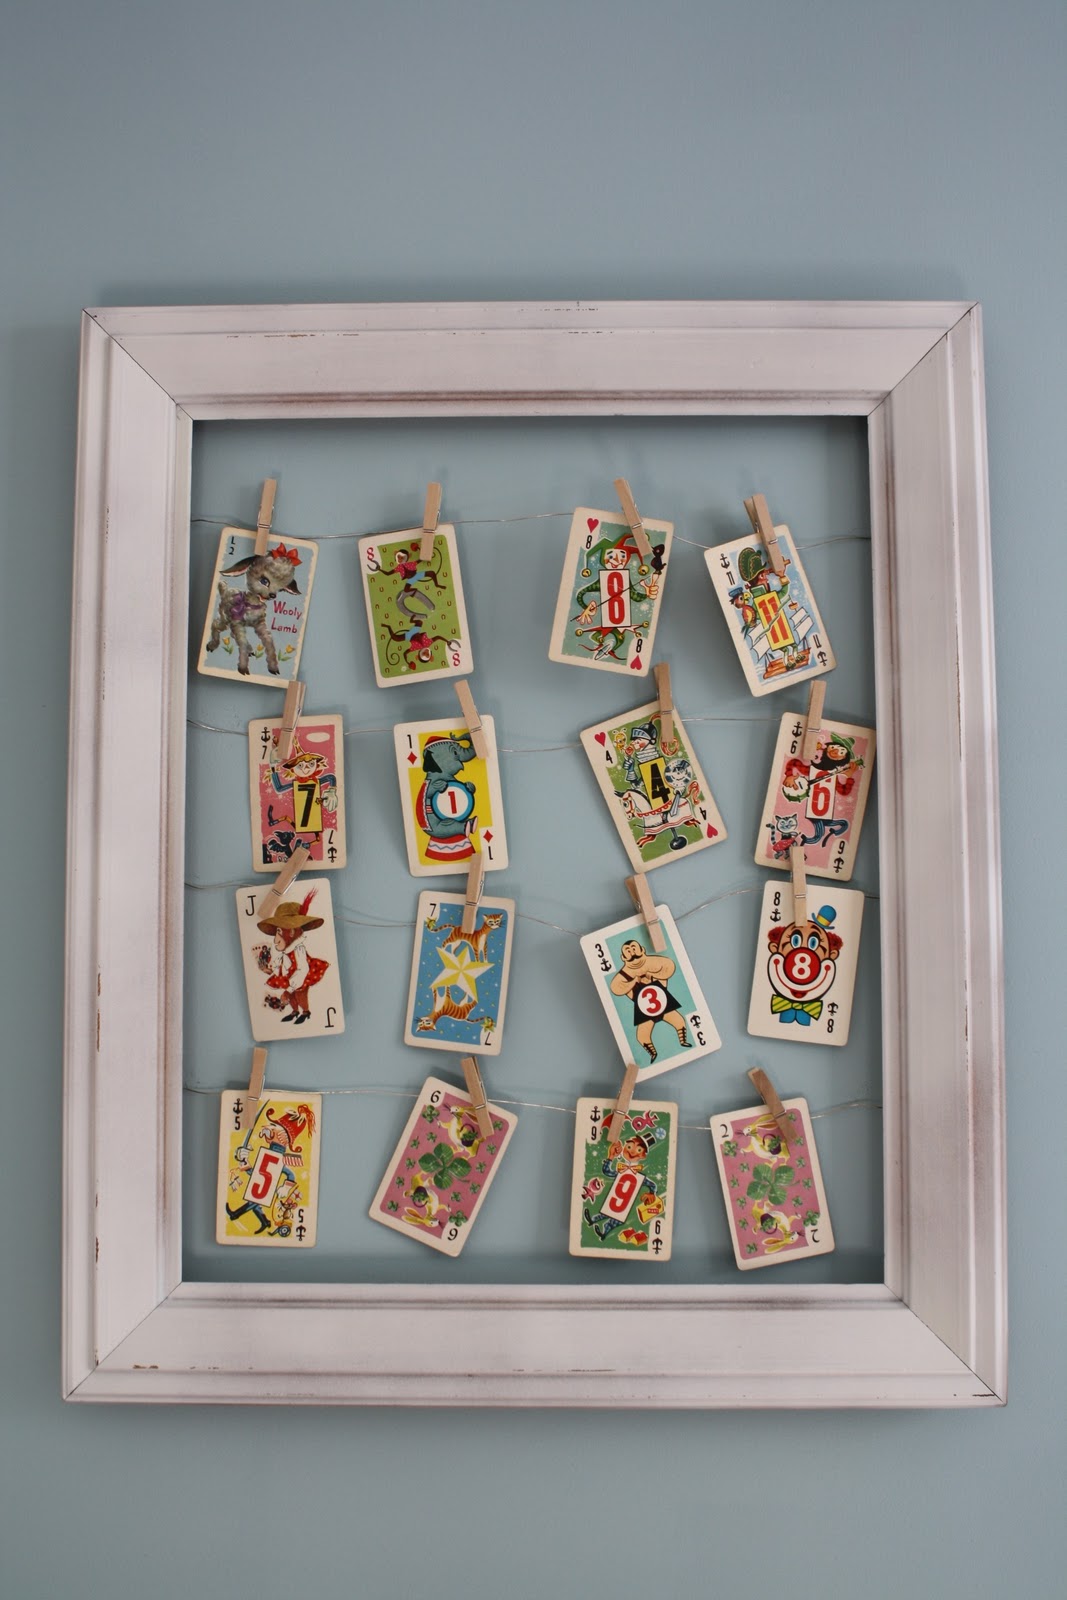

I also re-painted this frame, added some wire, vintage playing cards and you've got yourself some art work. :)
Her playroom is a vintage Dick and Jane theme so they match well.
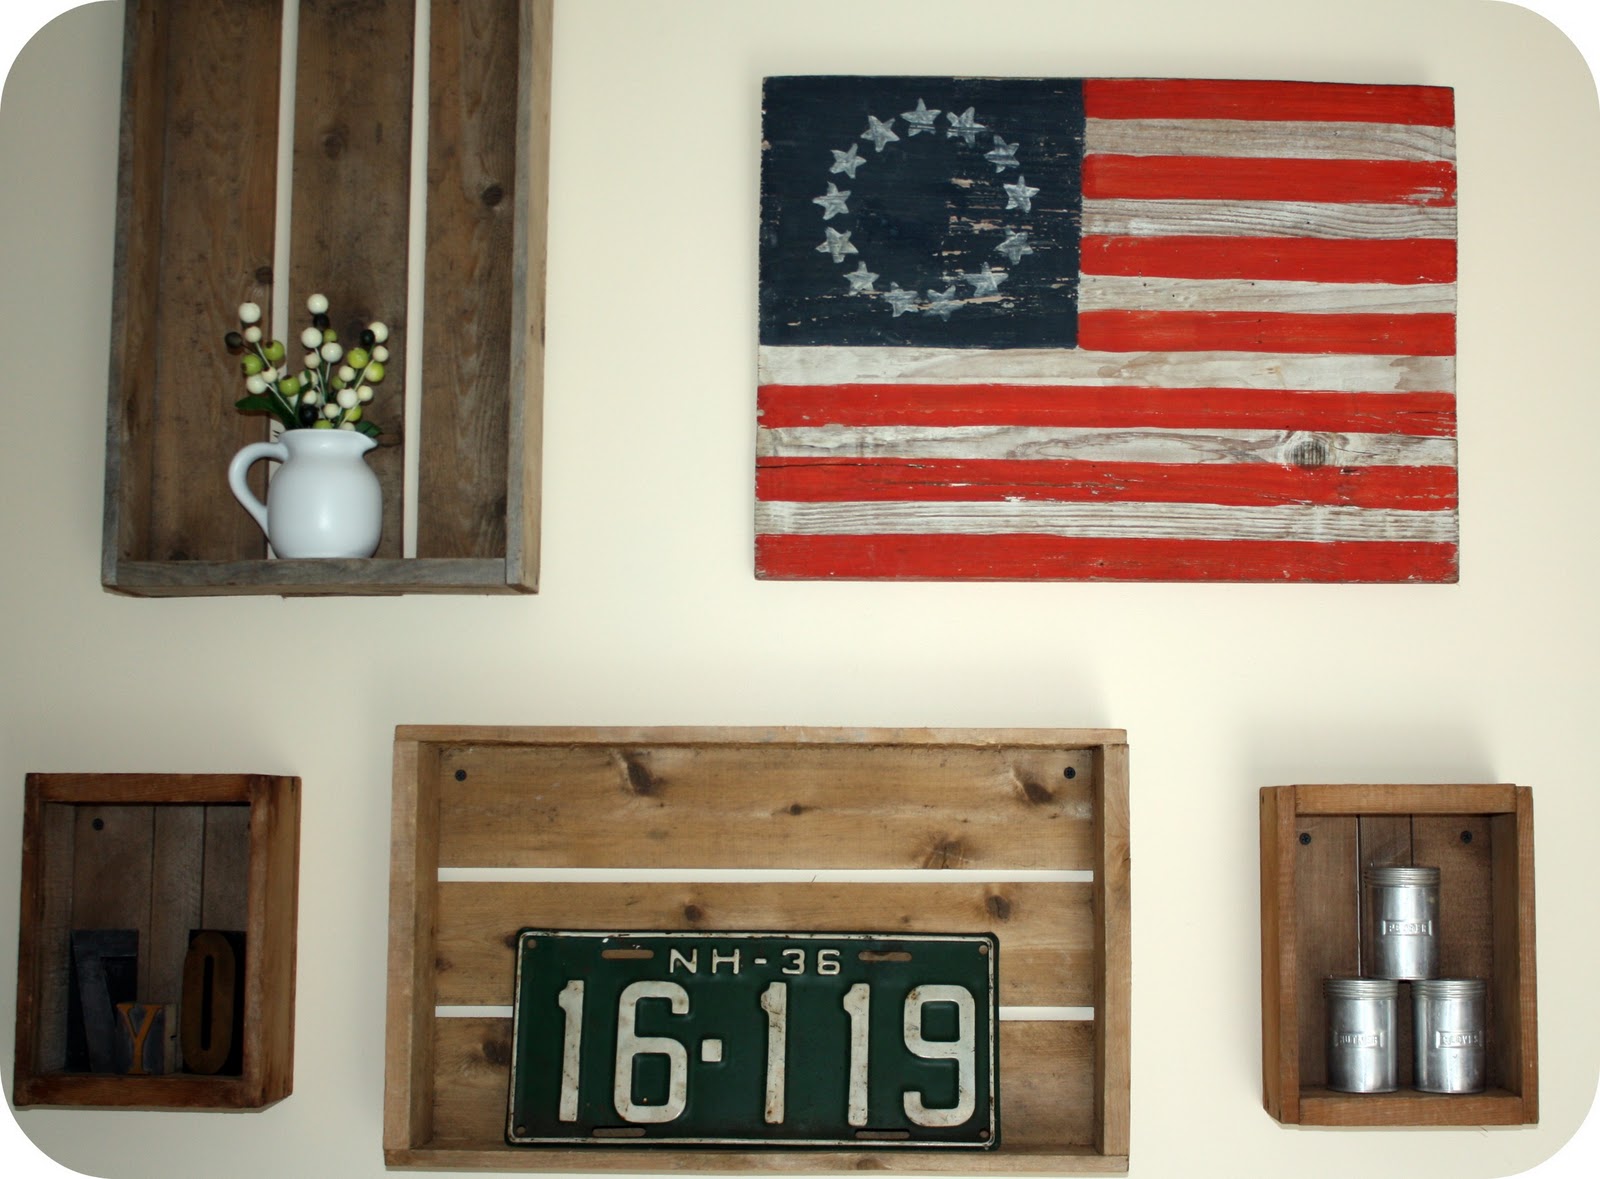
3. We turned old gardening crates into display shelves in our kitchen.
All we had to do was shake out the extra dirt and wipe them out with
soap and water. I love how they are different sizes to display all kinds
of treasures.
4.
I dont think their is such a thing as too much storage. We don't have a
home office so the solution to this has been great. We use an old
dresser in our living room to set our TV on. The drawers provide tons of
space for printer paper, envelopes, ipods/ chargers, magazines, DVDs
etc. Plus its a unique piece that people constantly comment on when they
come over.
Lastly,
some smaller things are a vase for my utensils,an old soda box for a
bar catch all ( does anyone else's bar seem to be a magnet for anything
and everything??), a towel rack and shower curtain hooks to hold
scissors etc, and a step stool as a plant display.


Hope these spark some ideas of your own to re-purpose items in your home!
Stop by "Be Sweet" for a chance to win 10 vintage playing cards for your own art work! :)
Thanks again for having me Jen!

Thanks Amanda -- wonderful ideas!!
I love up-cycling and re-purposing!!
Some other great ideas that I love at Be Sweet are:


Be sure to stop by Be Sweet and enter her giveaway --
you will love following Amanda along in her thrifting adventures!!
xoxox
Subscribe to:
Posts (Atom)


Home & Garden listings

Oferty i praca w Zarabiaj.pl
Hotell i Barcelona


